Implement SAML authentication
In external tenants, you can register applications that use the OpenID Connect (OIDC) or Security Assertion Markup Language (SAML) protocol for authentication and single sign-on. In this demo explains how to implement SAML application (service principal) with Microsoft Entra external ID (private preview).
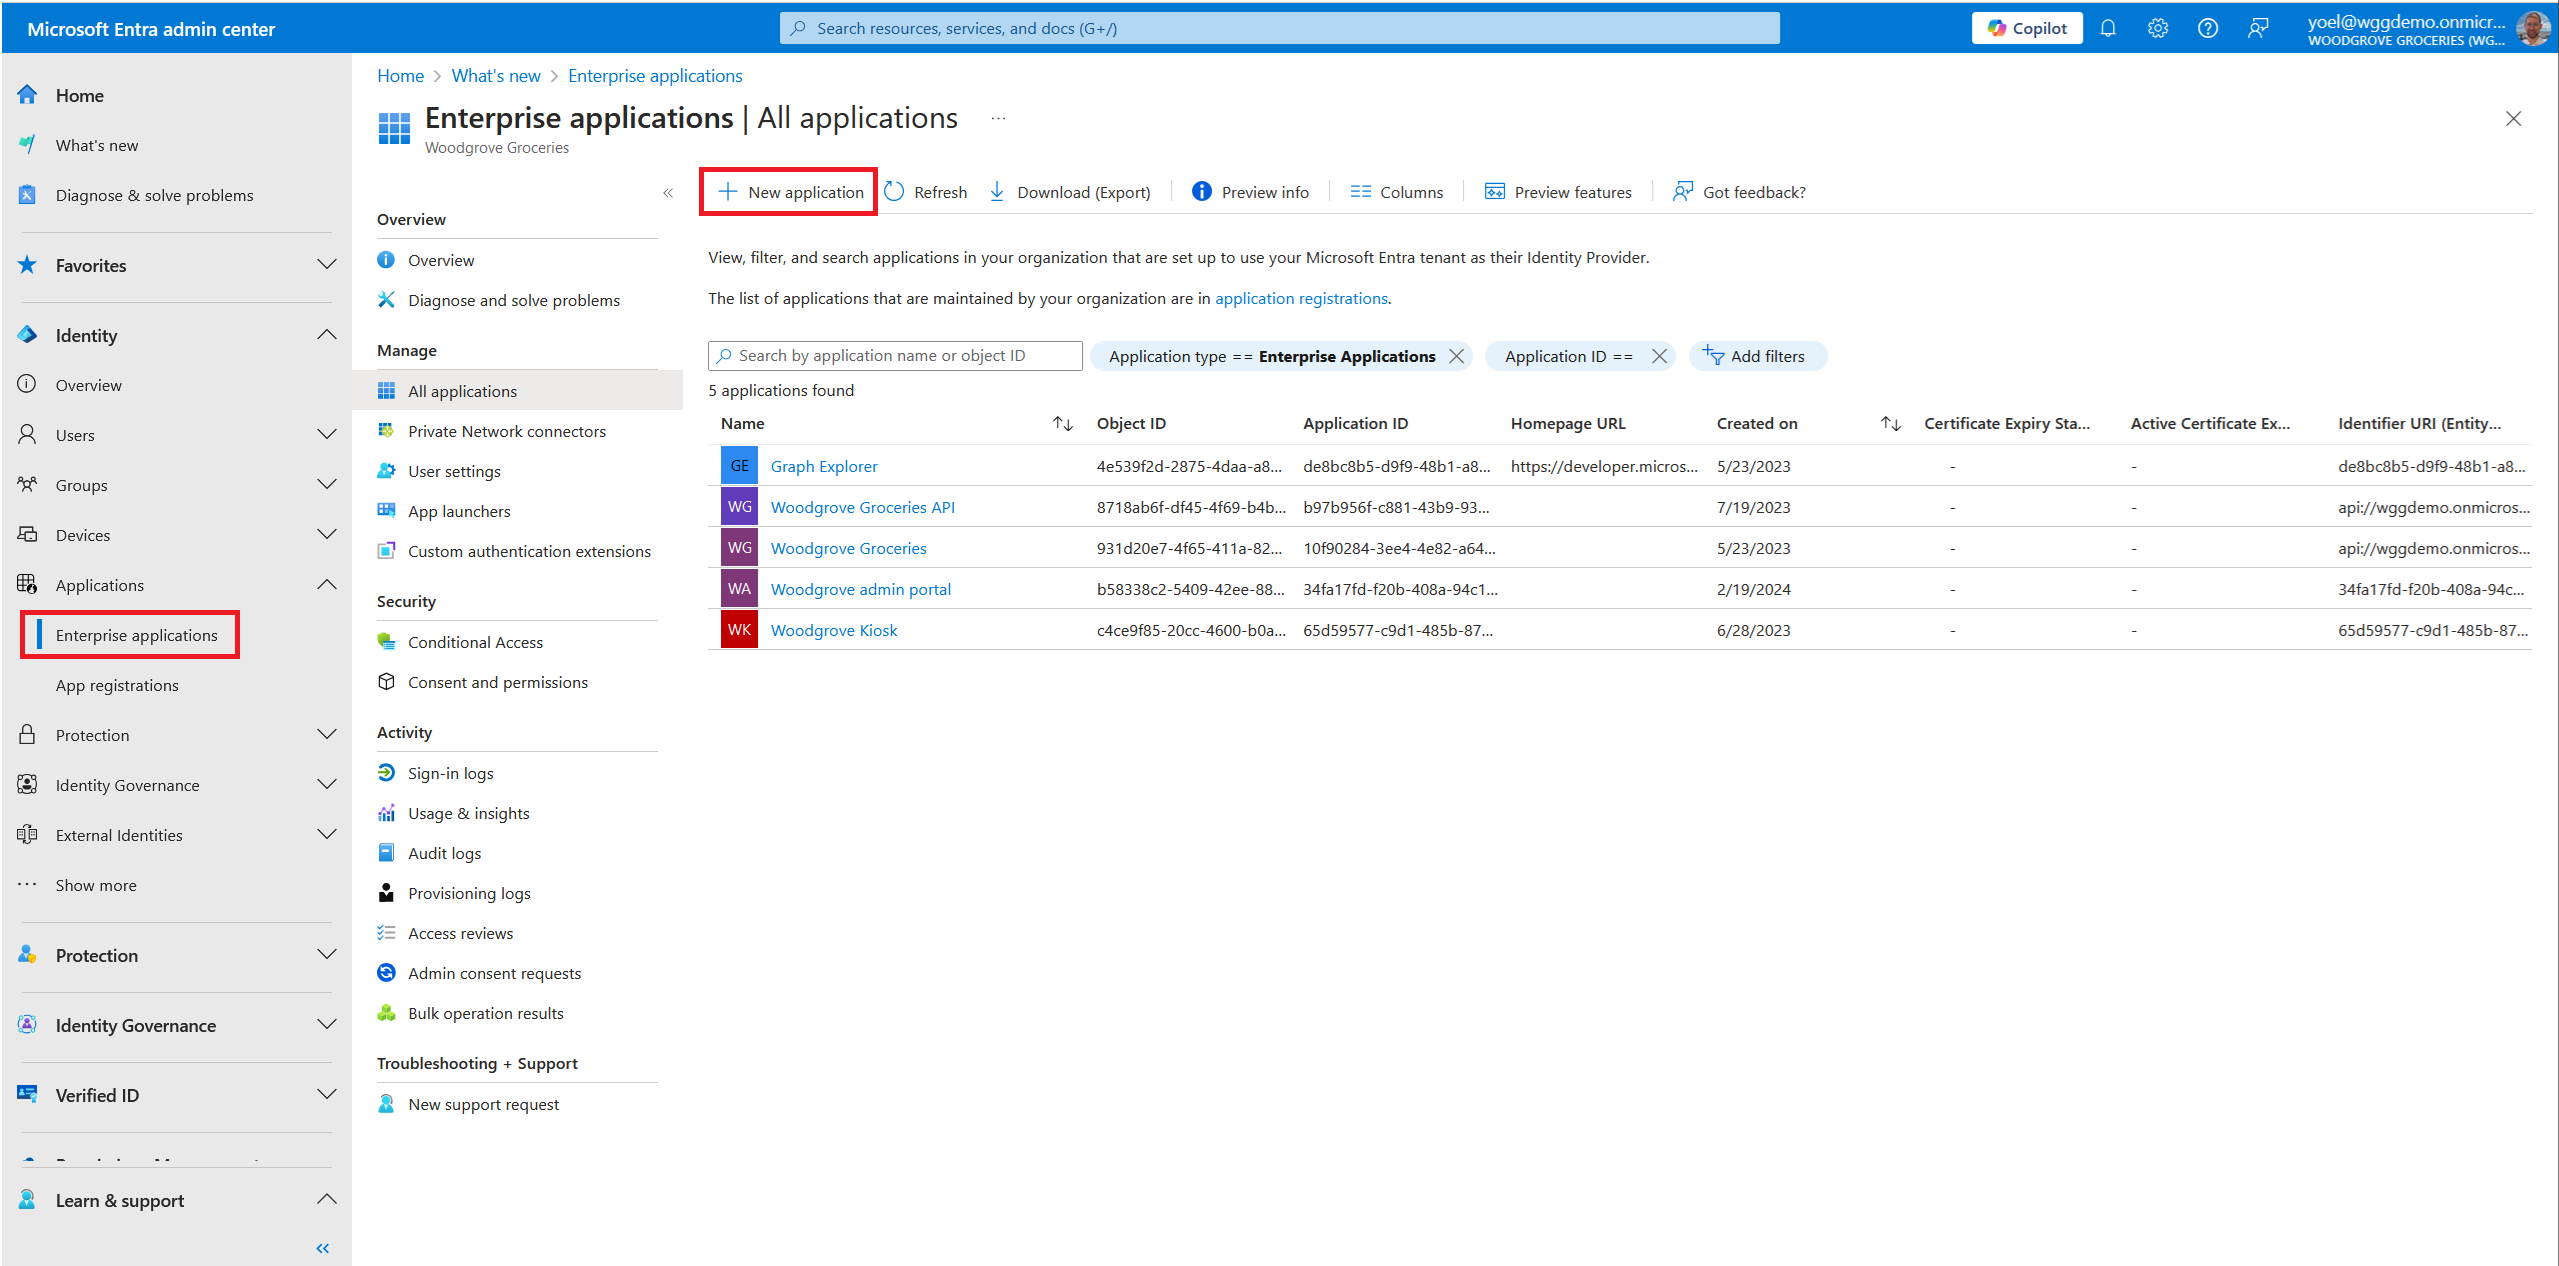
To register a SAML application, sign in to the Microsoft Entra admin center and browse to Enterprise applications . Then, select + New application.
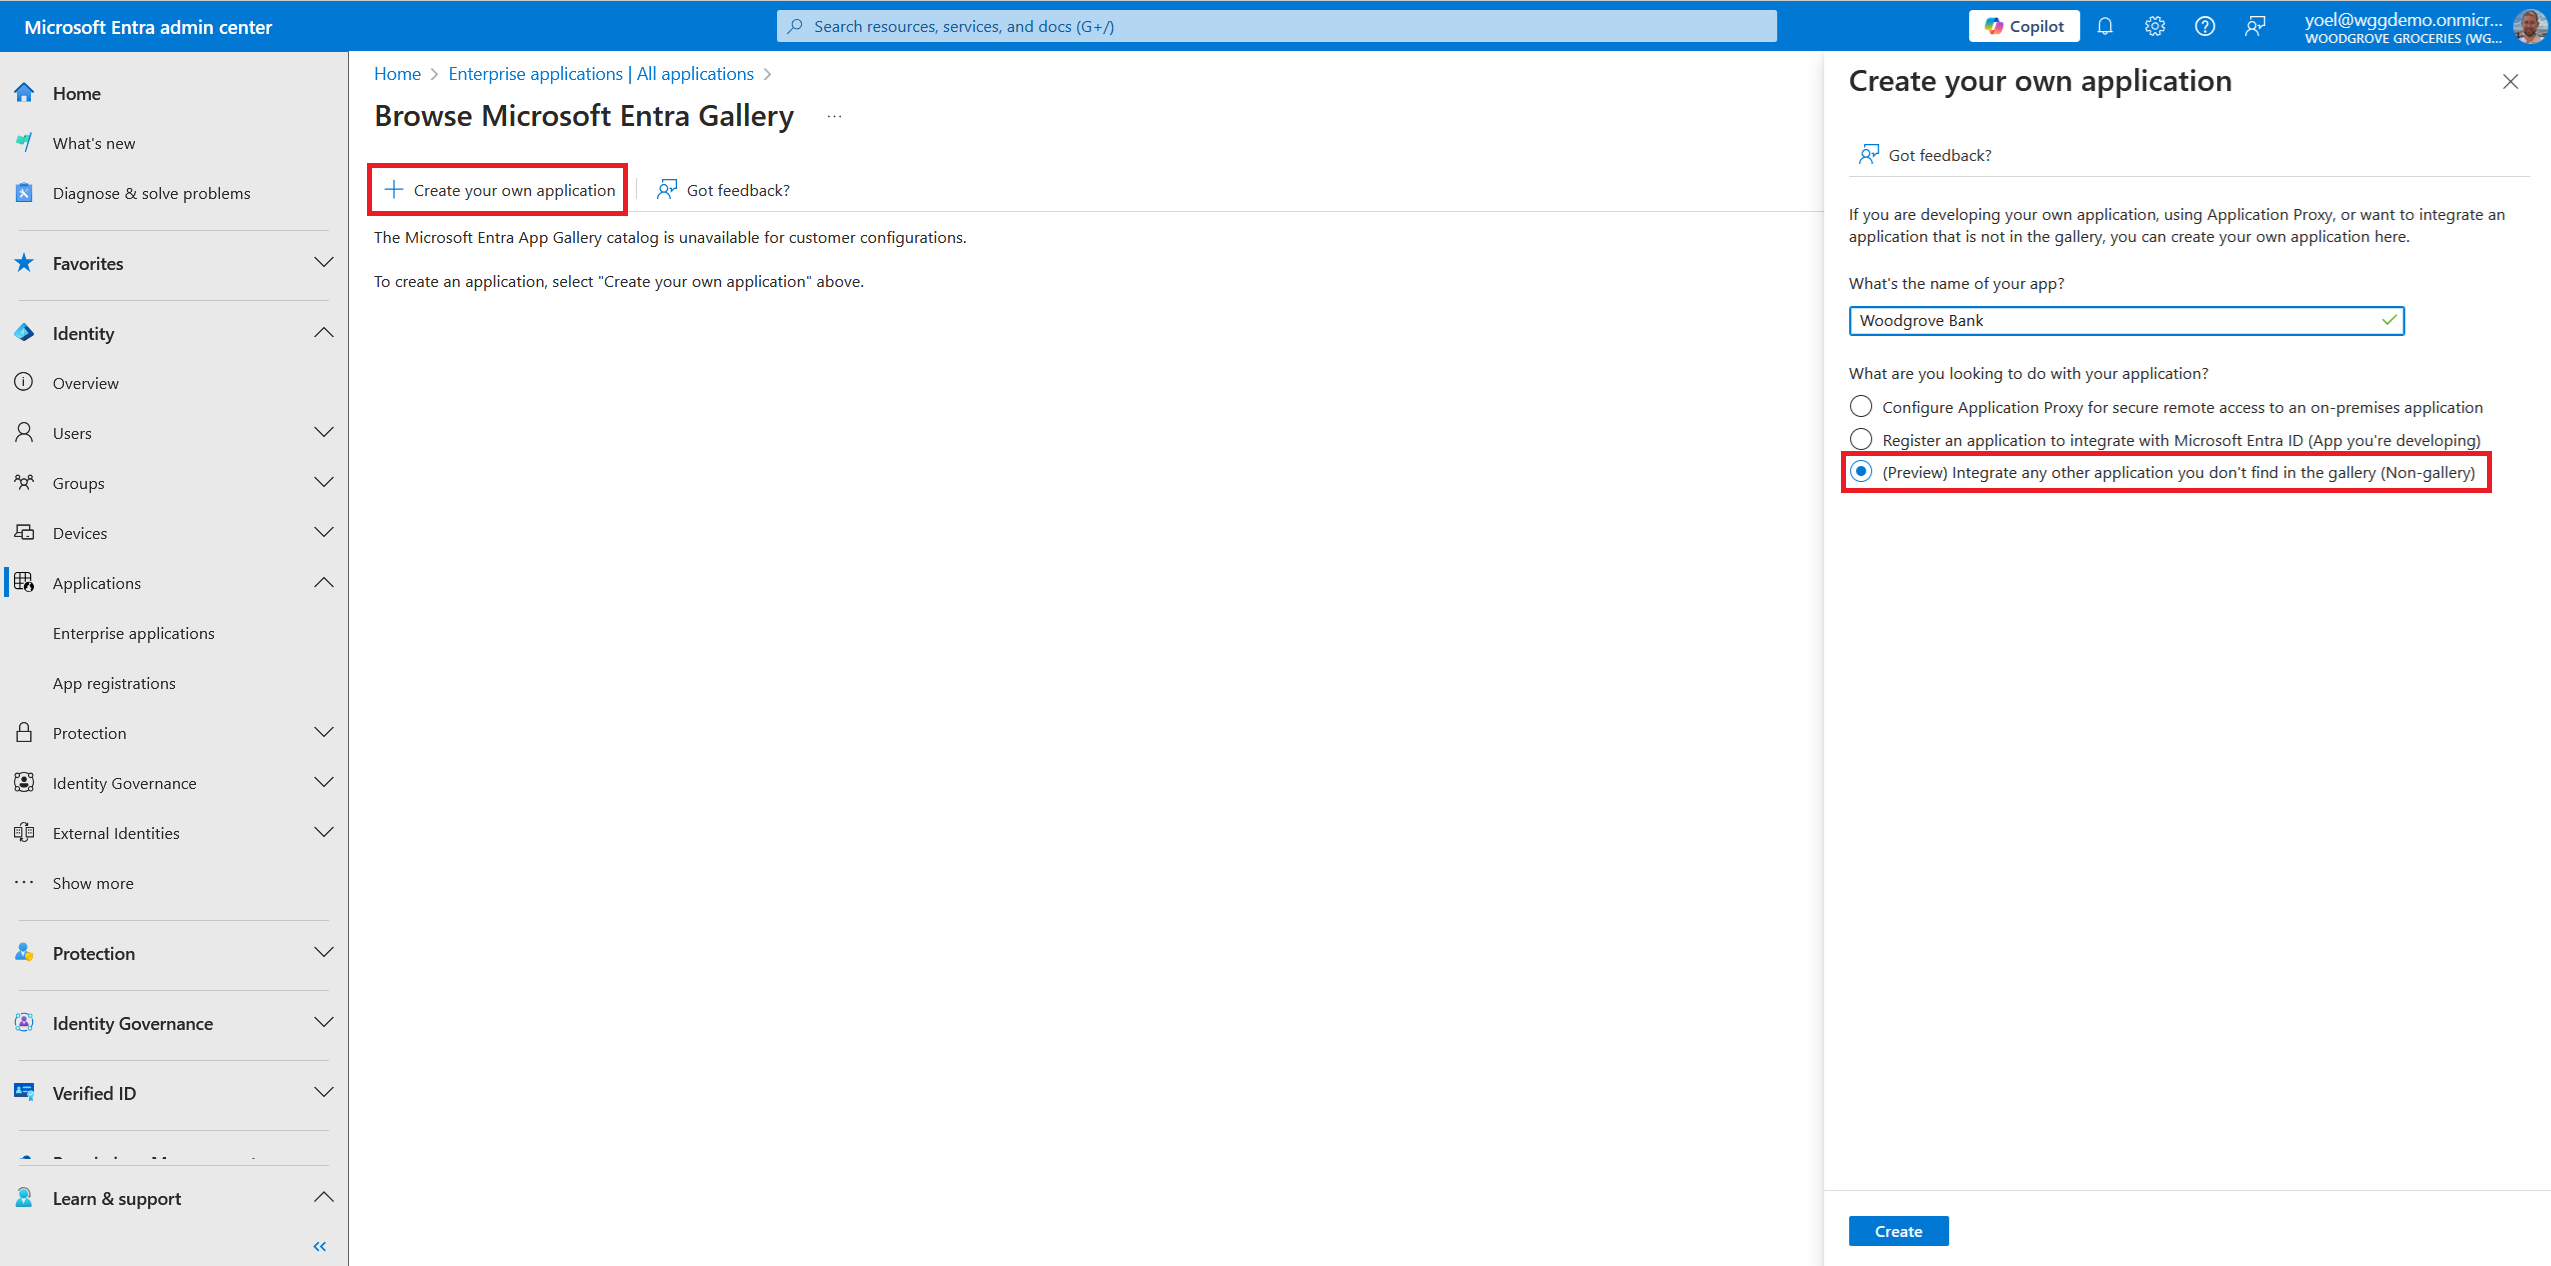
From the Browse Microsoft Entra Gallery, select Create your own application. Enter a name for your application. Then, select the Integrate any other application you don't find in the gallery (Non-gallery) option.
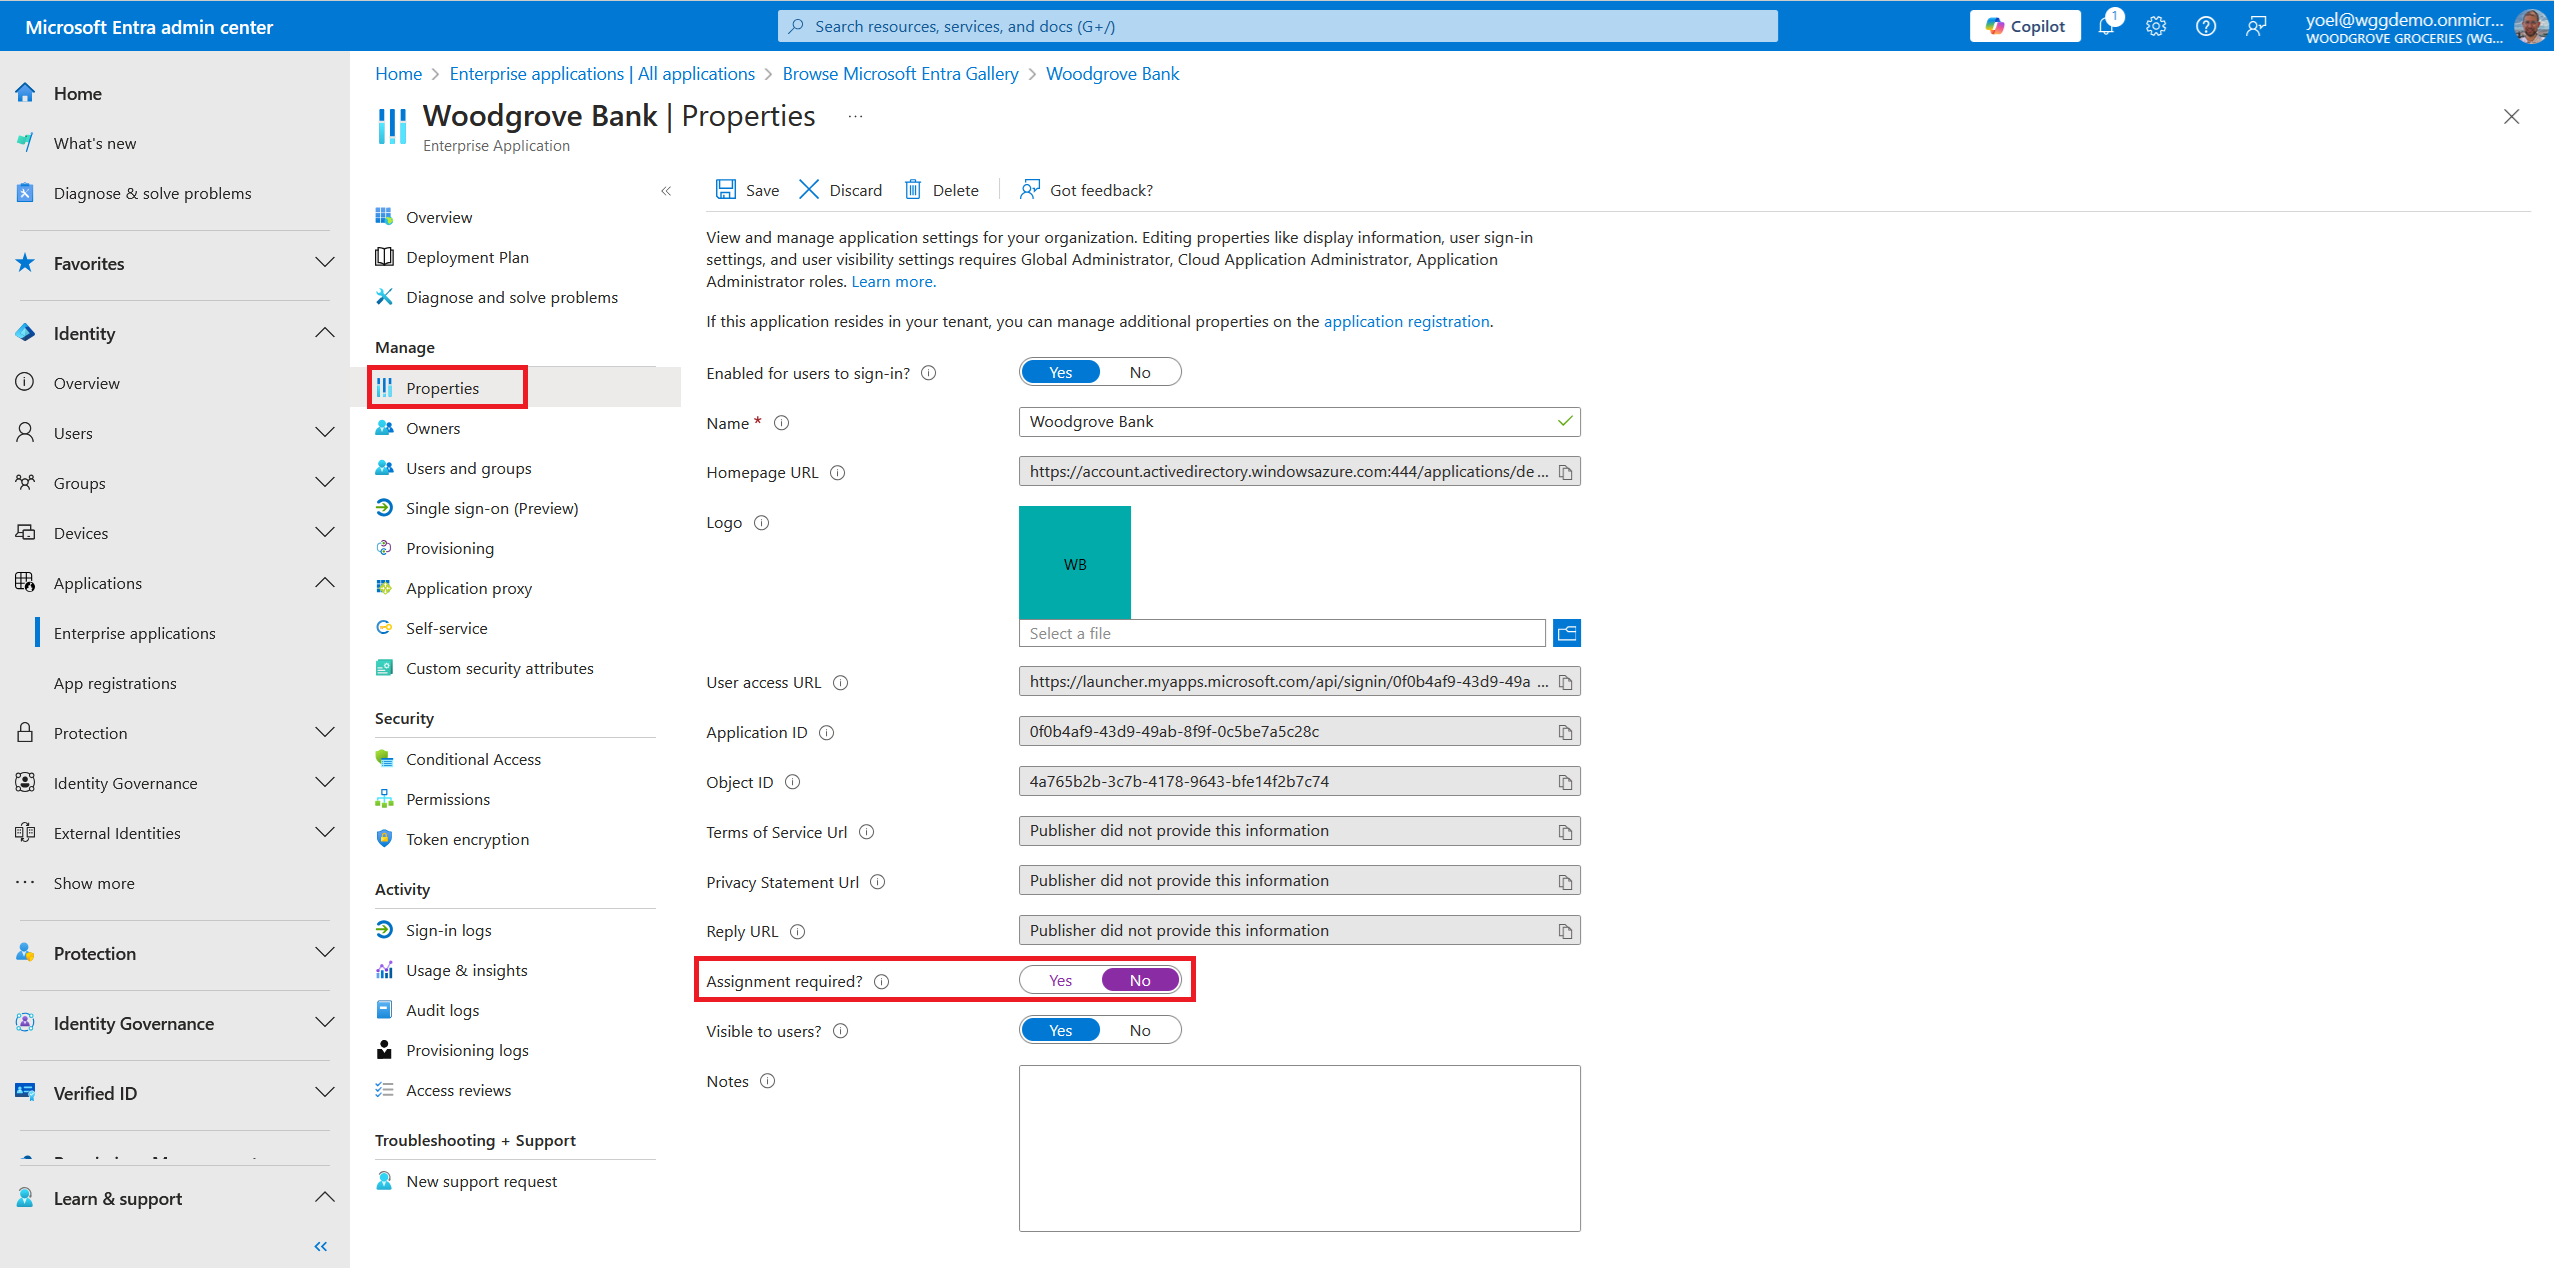
From the menu, select Properties. Then, disable the Assignment required? option and Save the changes.
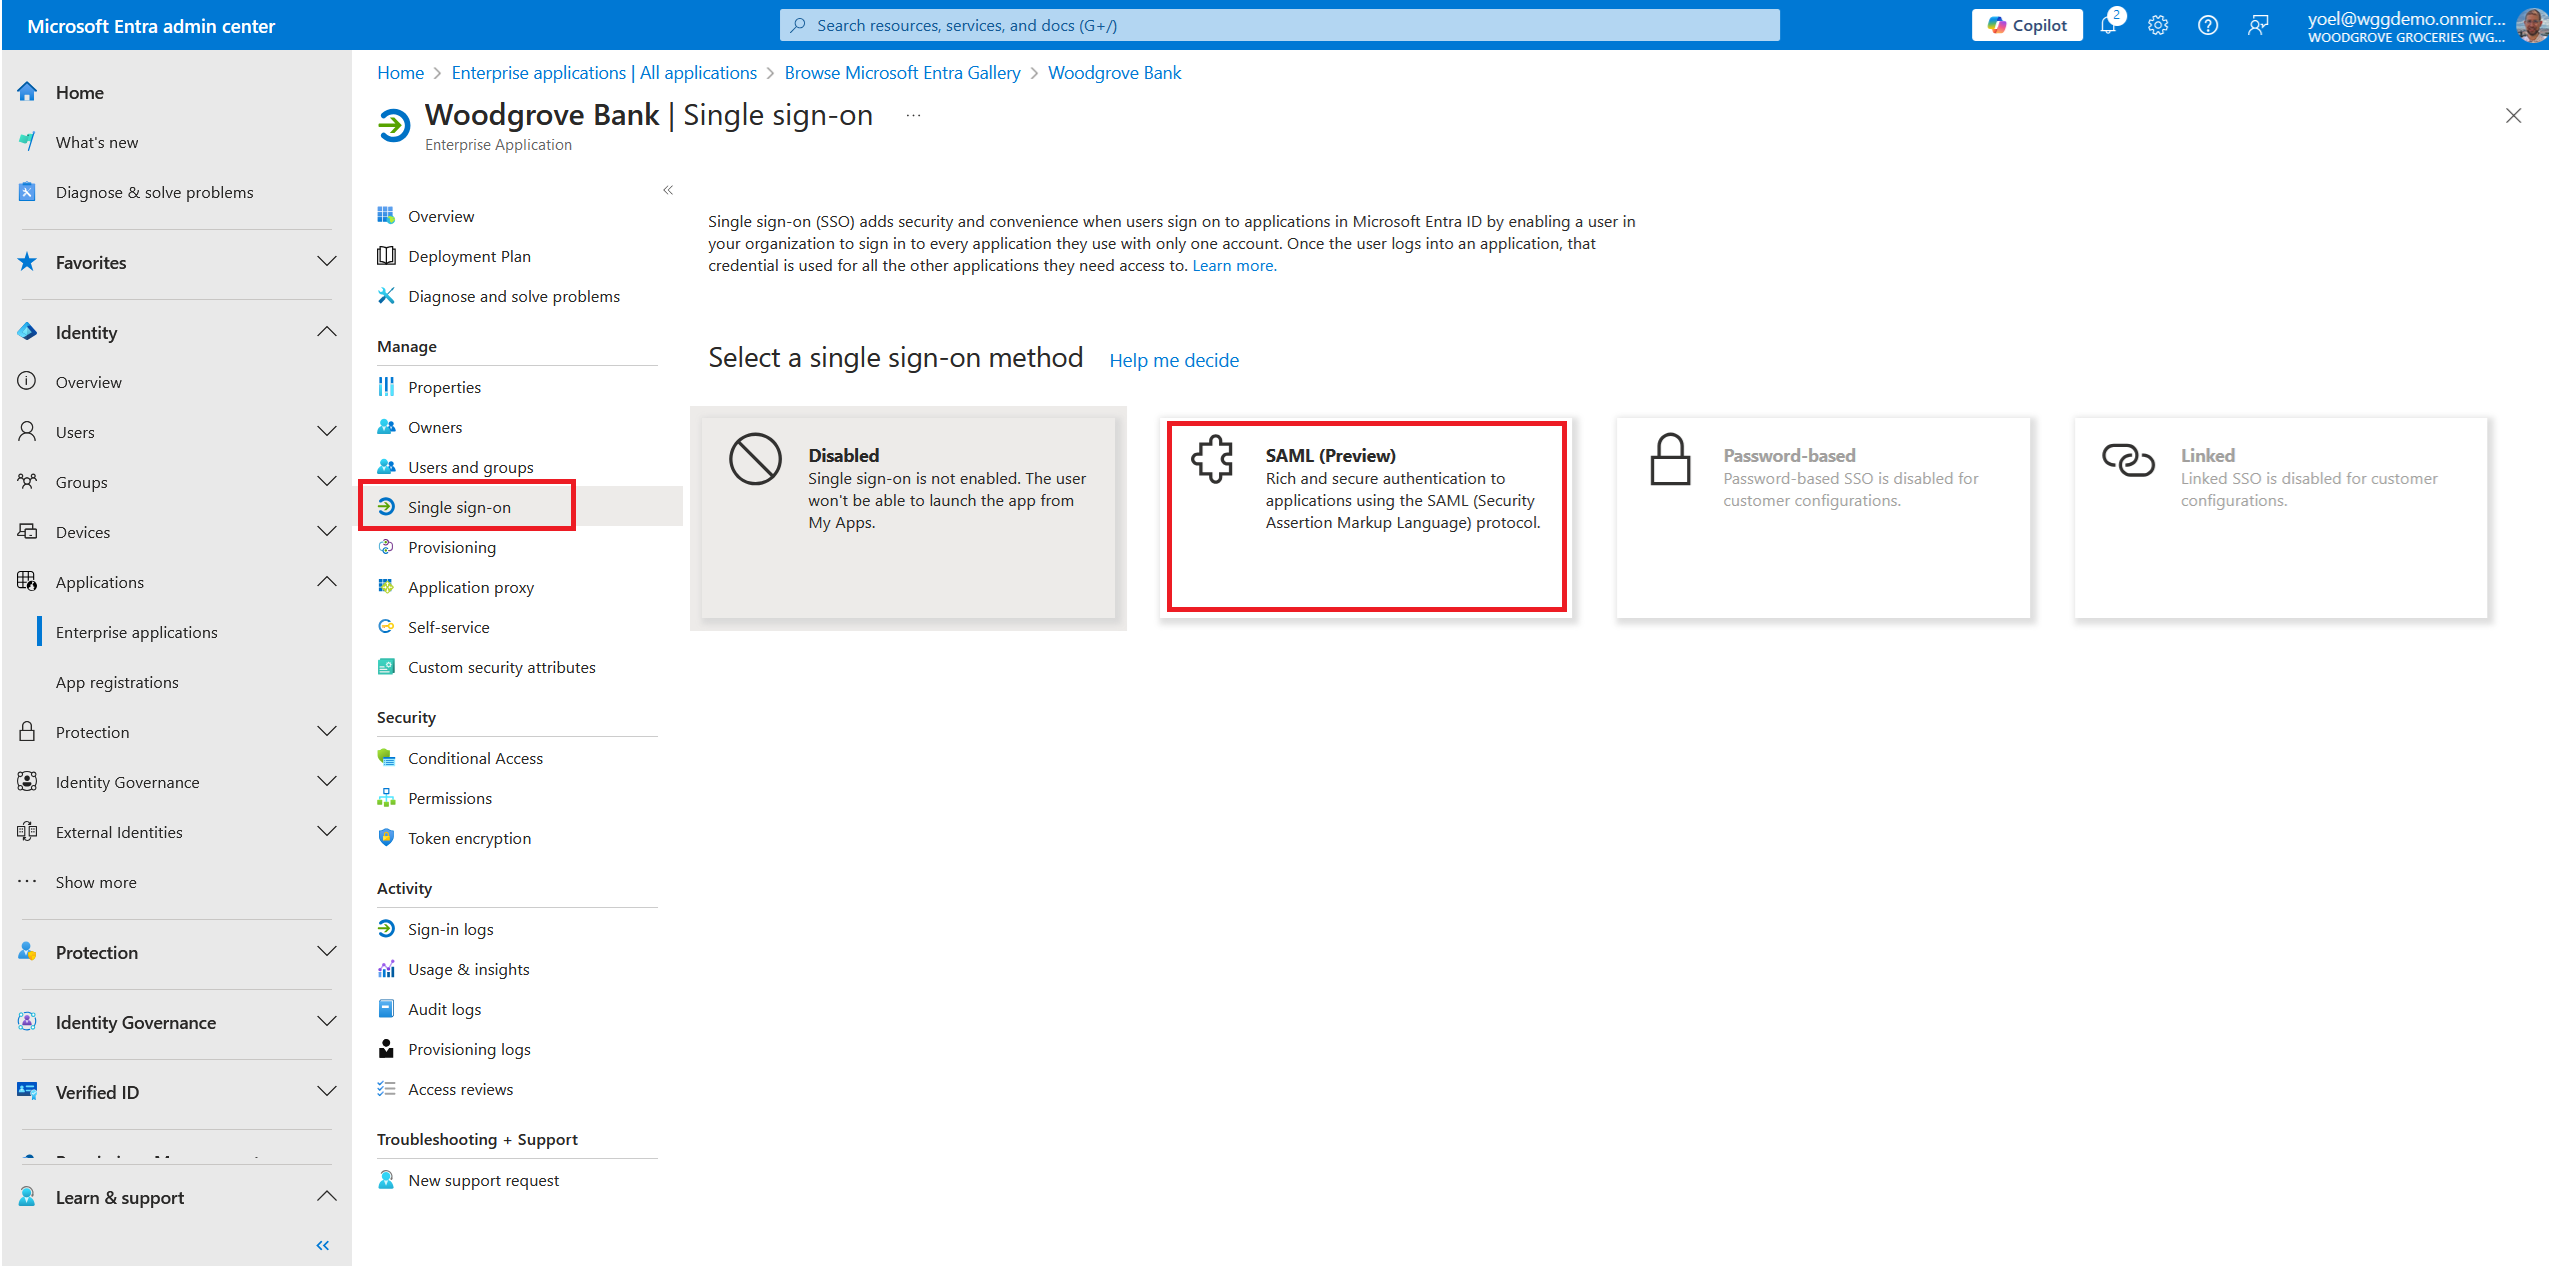
From the menu, select Single sign-on. Then, select the SAML single sign-on option.
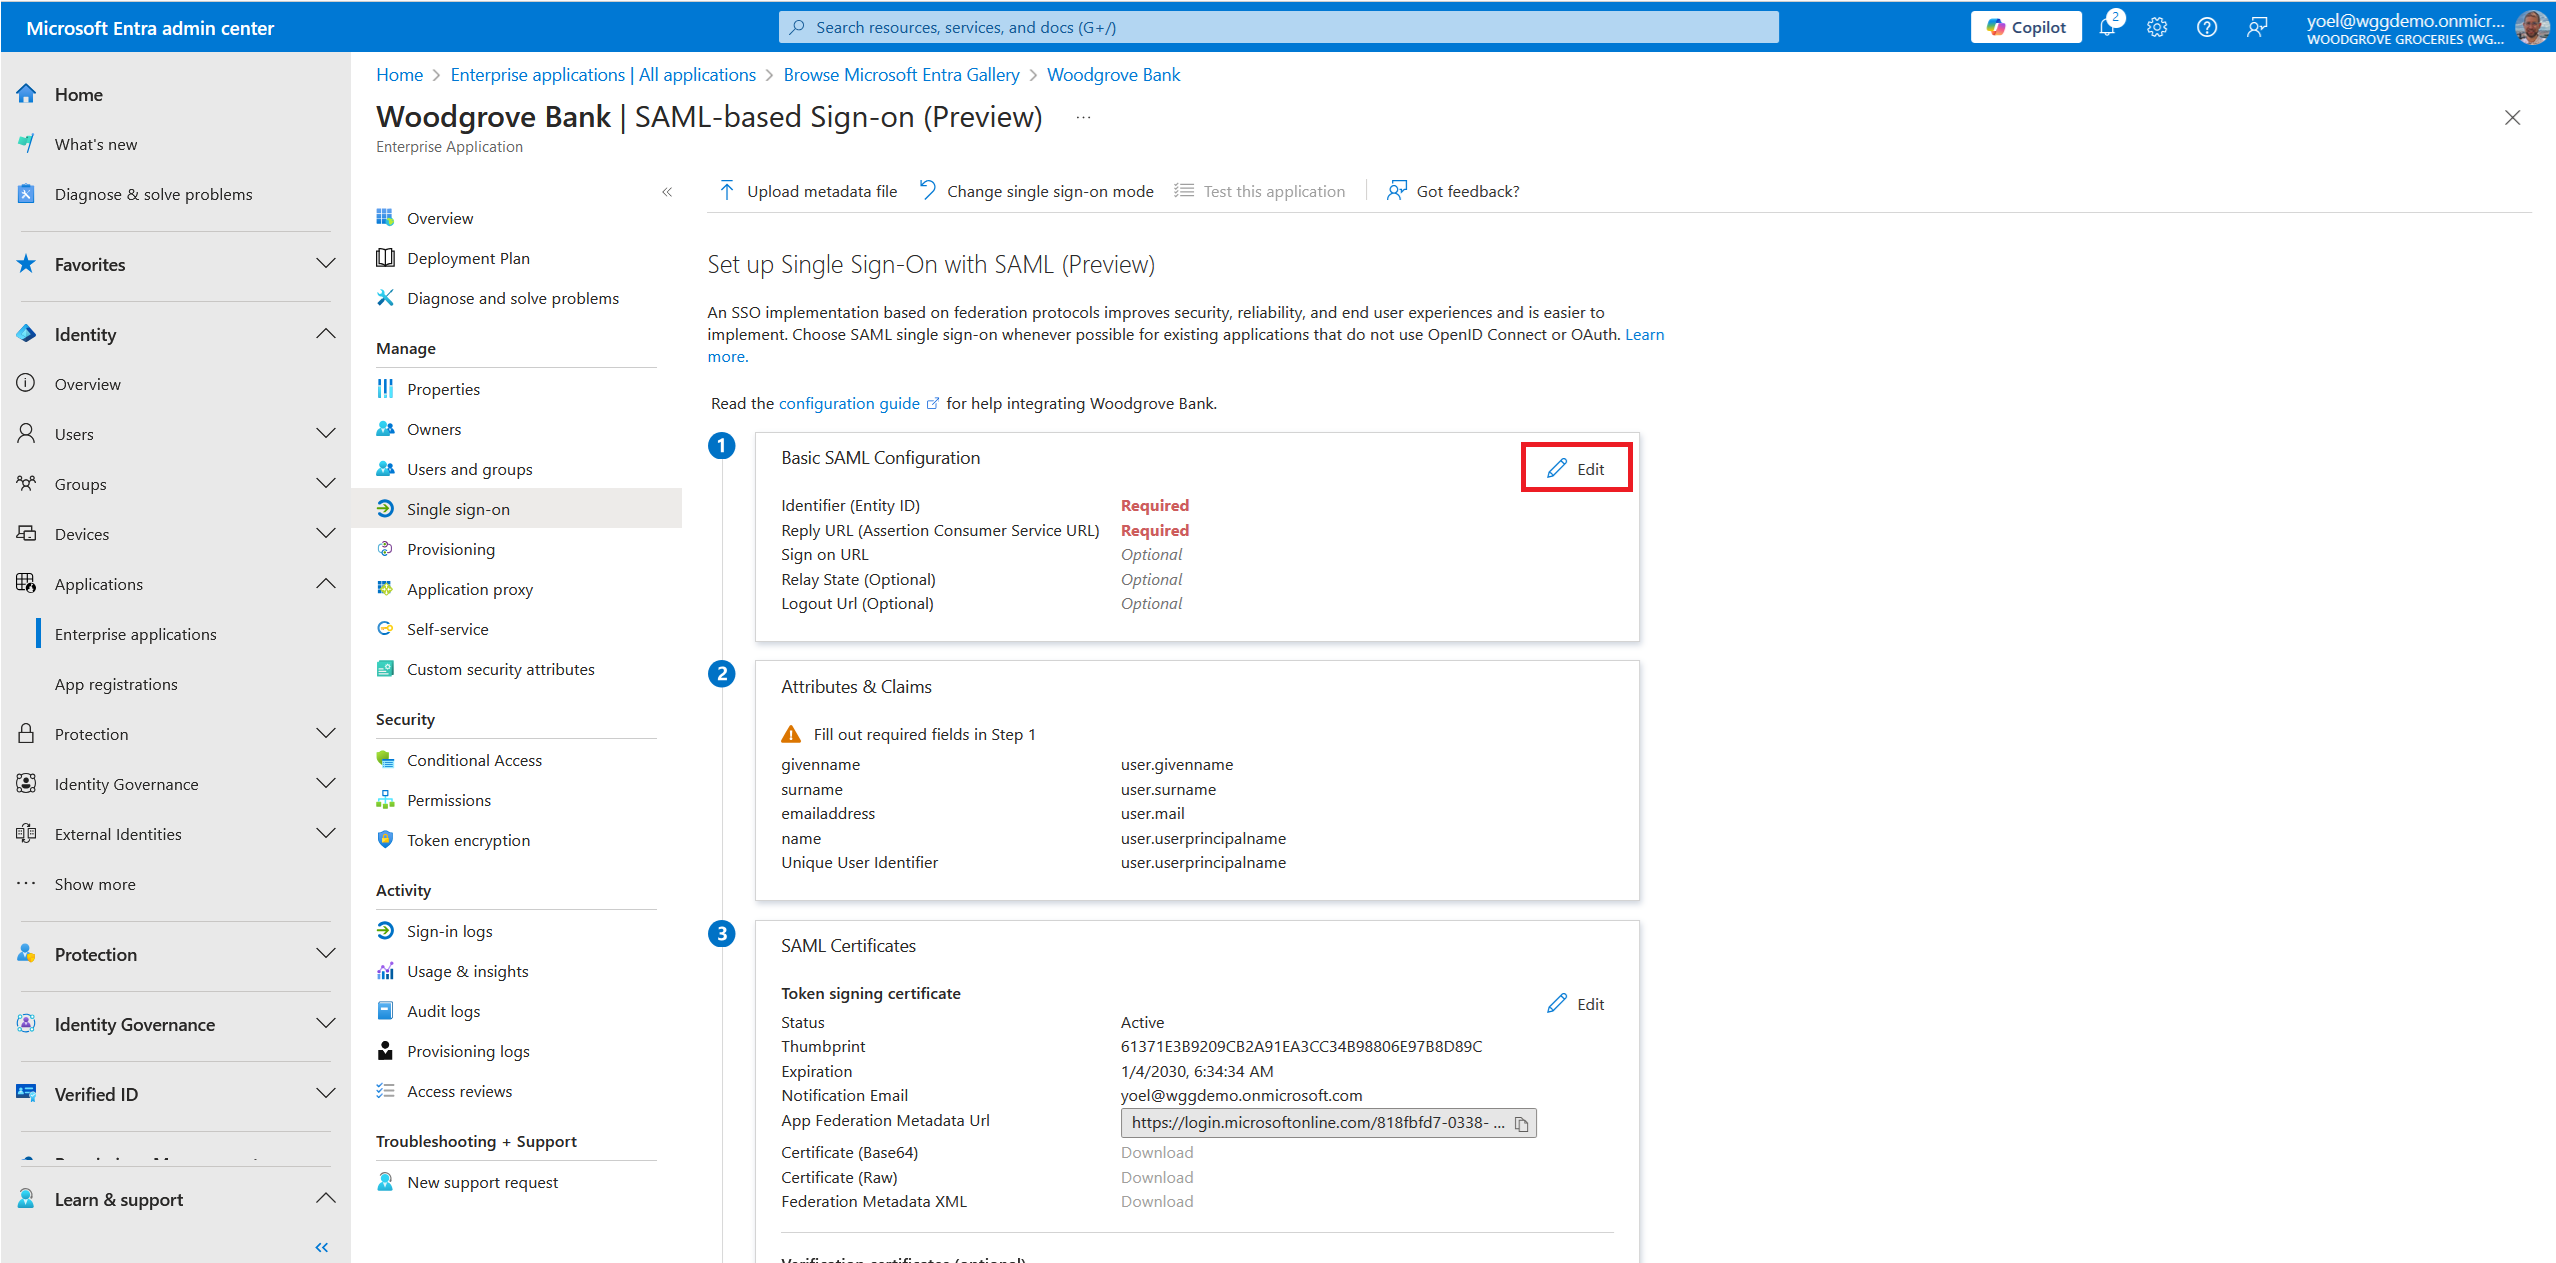
On the Set up Single Sign-On with SAML page, select the Edit button next to the Basic SAML Configuration.
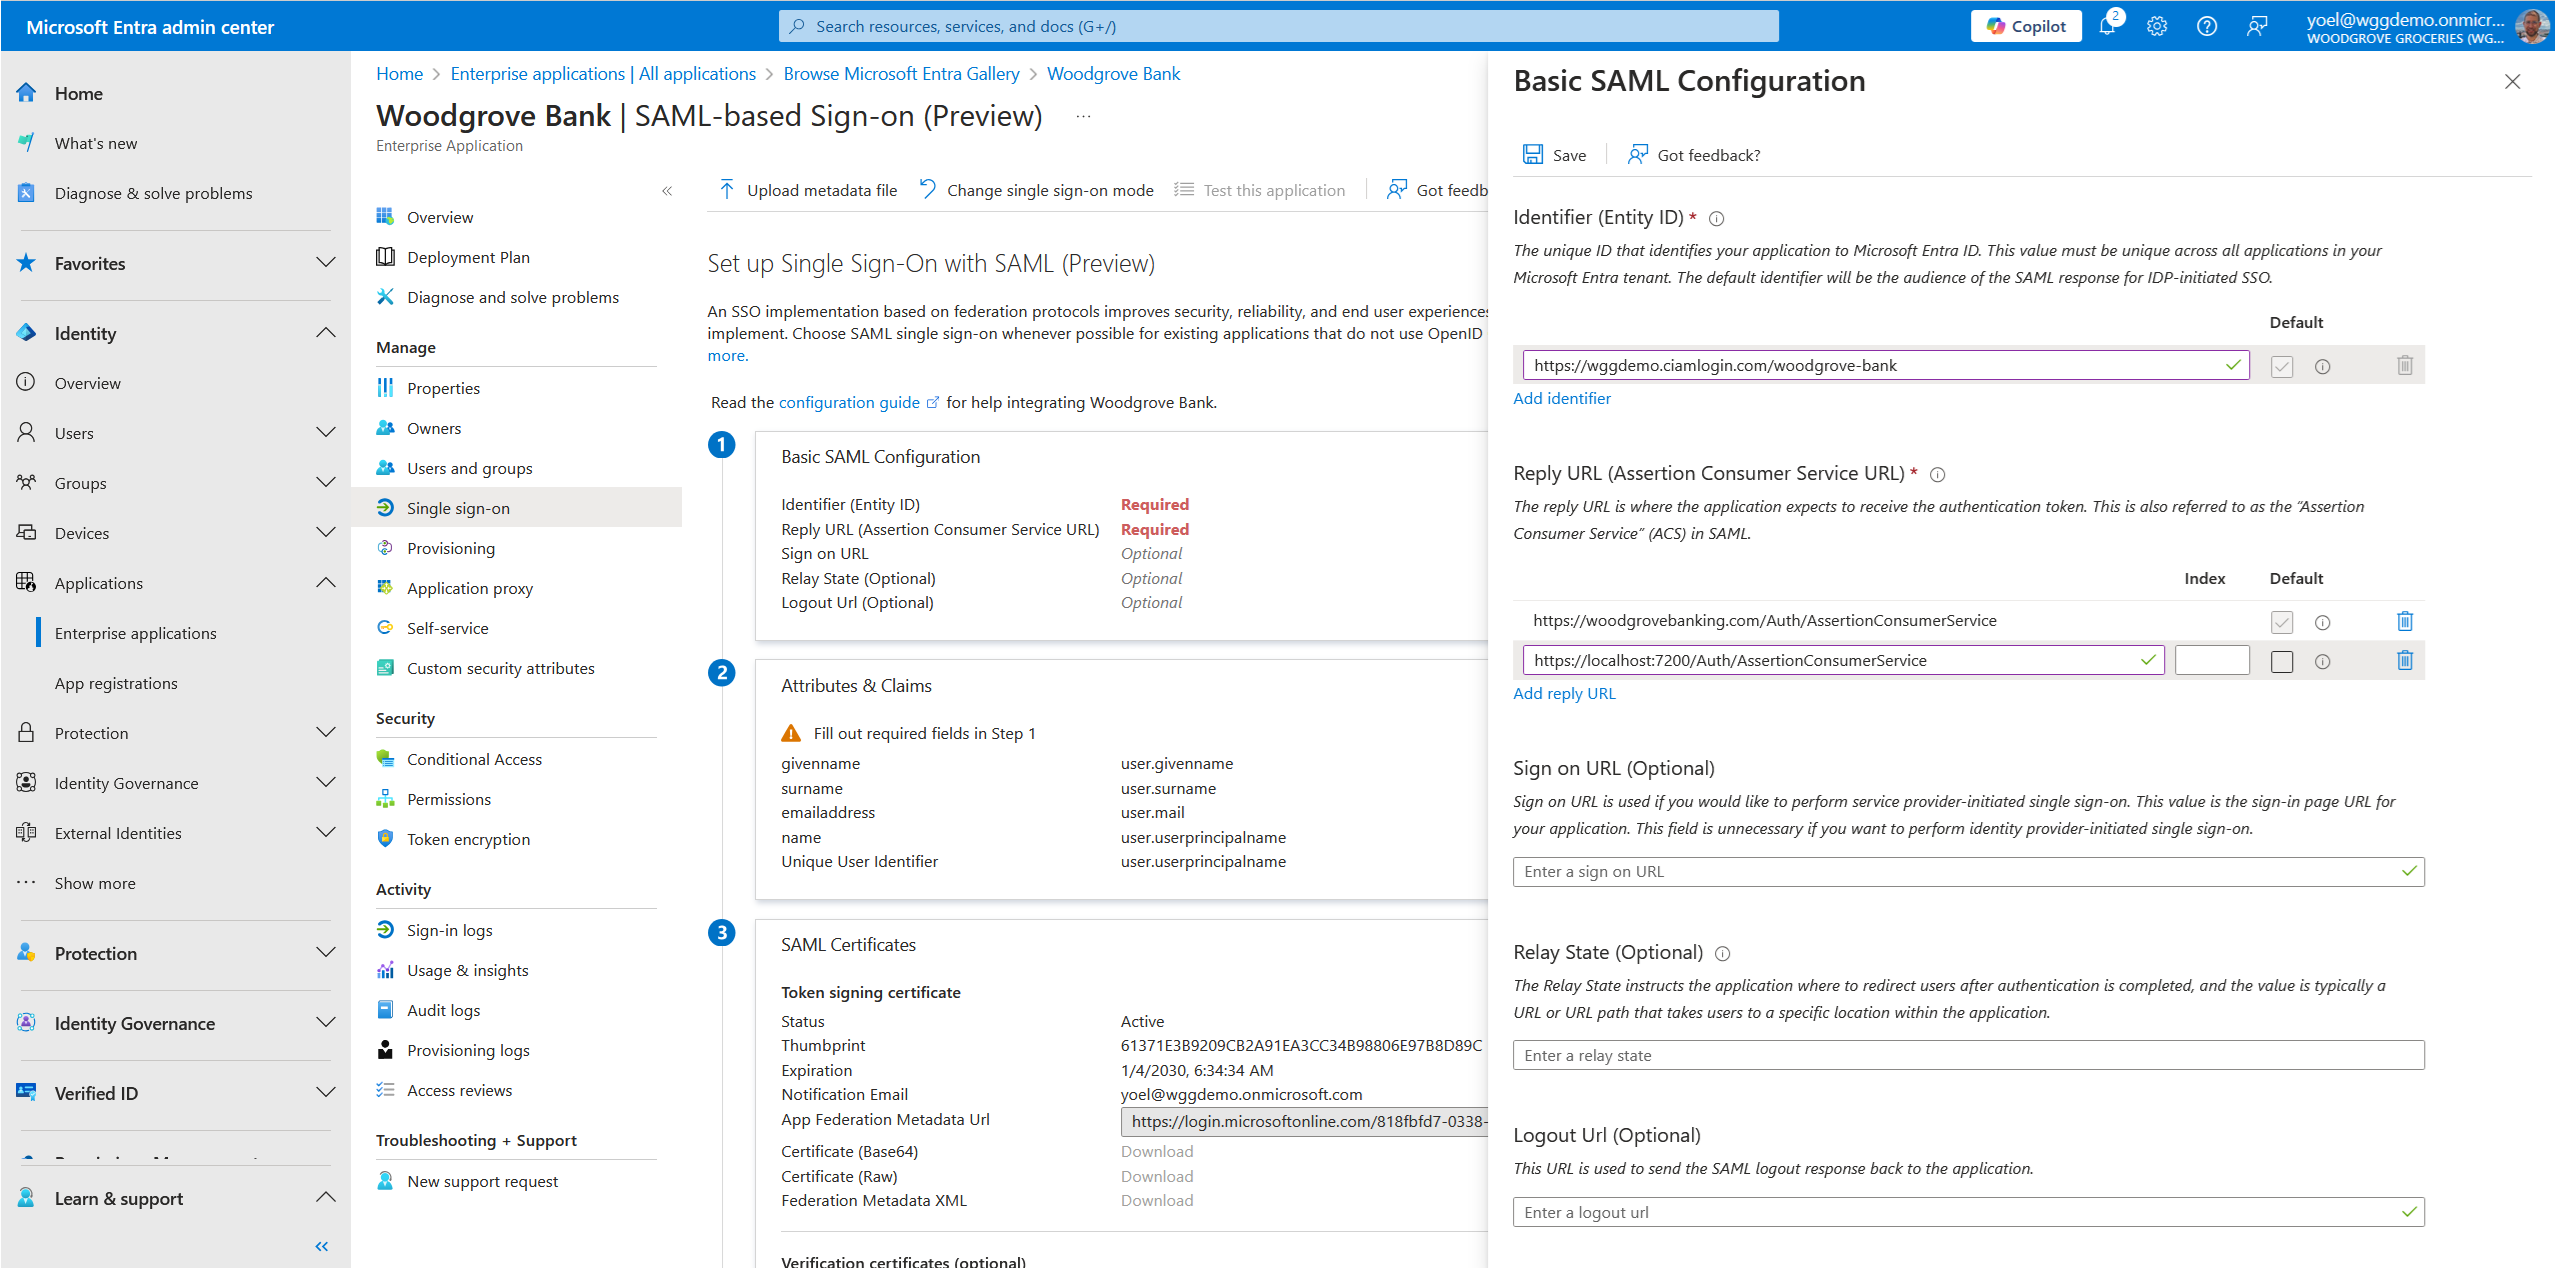
On the Basic SAML Configuration:
- Enter an Identifier (Entity ID). This is the unique ID that identifies your application to Microsoft Entra ID. This value must be unique across all applications in your Microsoft Entra tenant.
- Enter a Reply URL (Assertion Consumer Service URL). It's where your application expects to receive the authentication SAML token. This is also referred to as the “Assertion Consumer Service” (ACS) in SAML.
- Save the changes
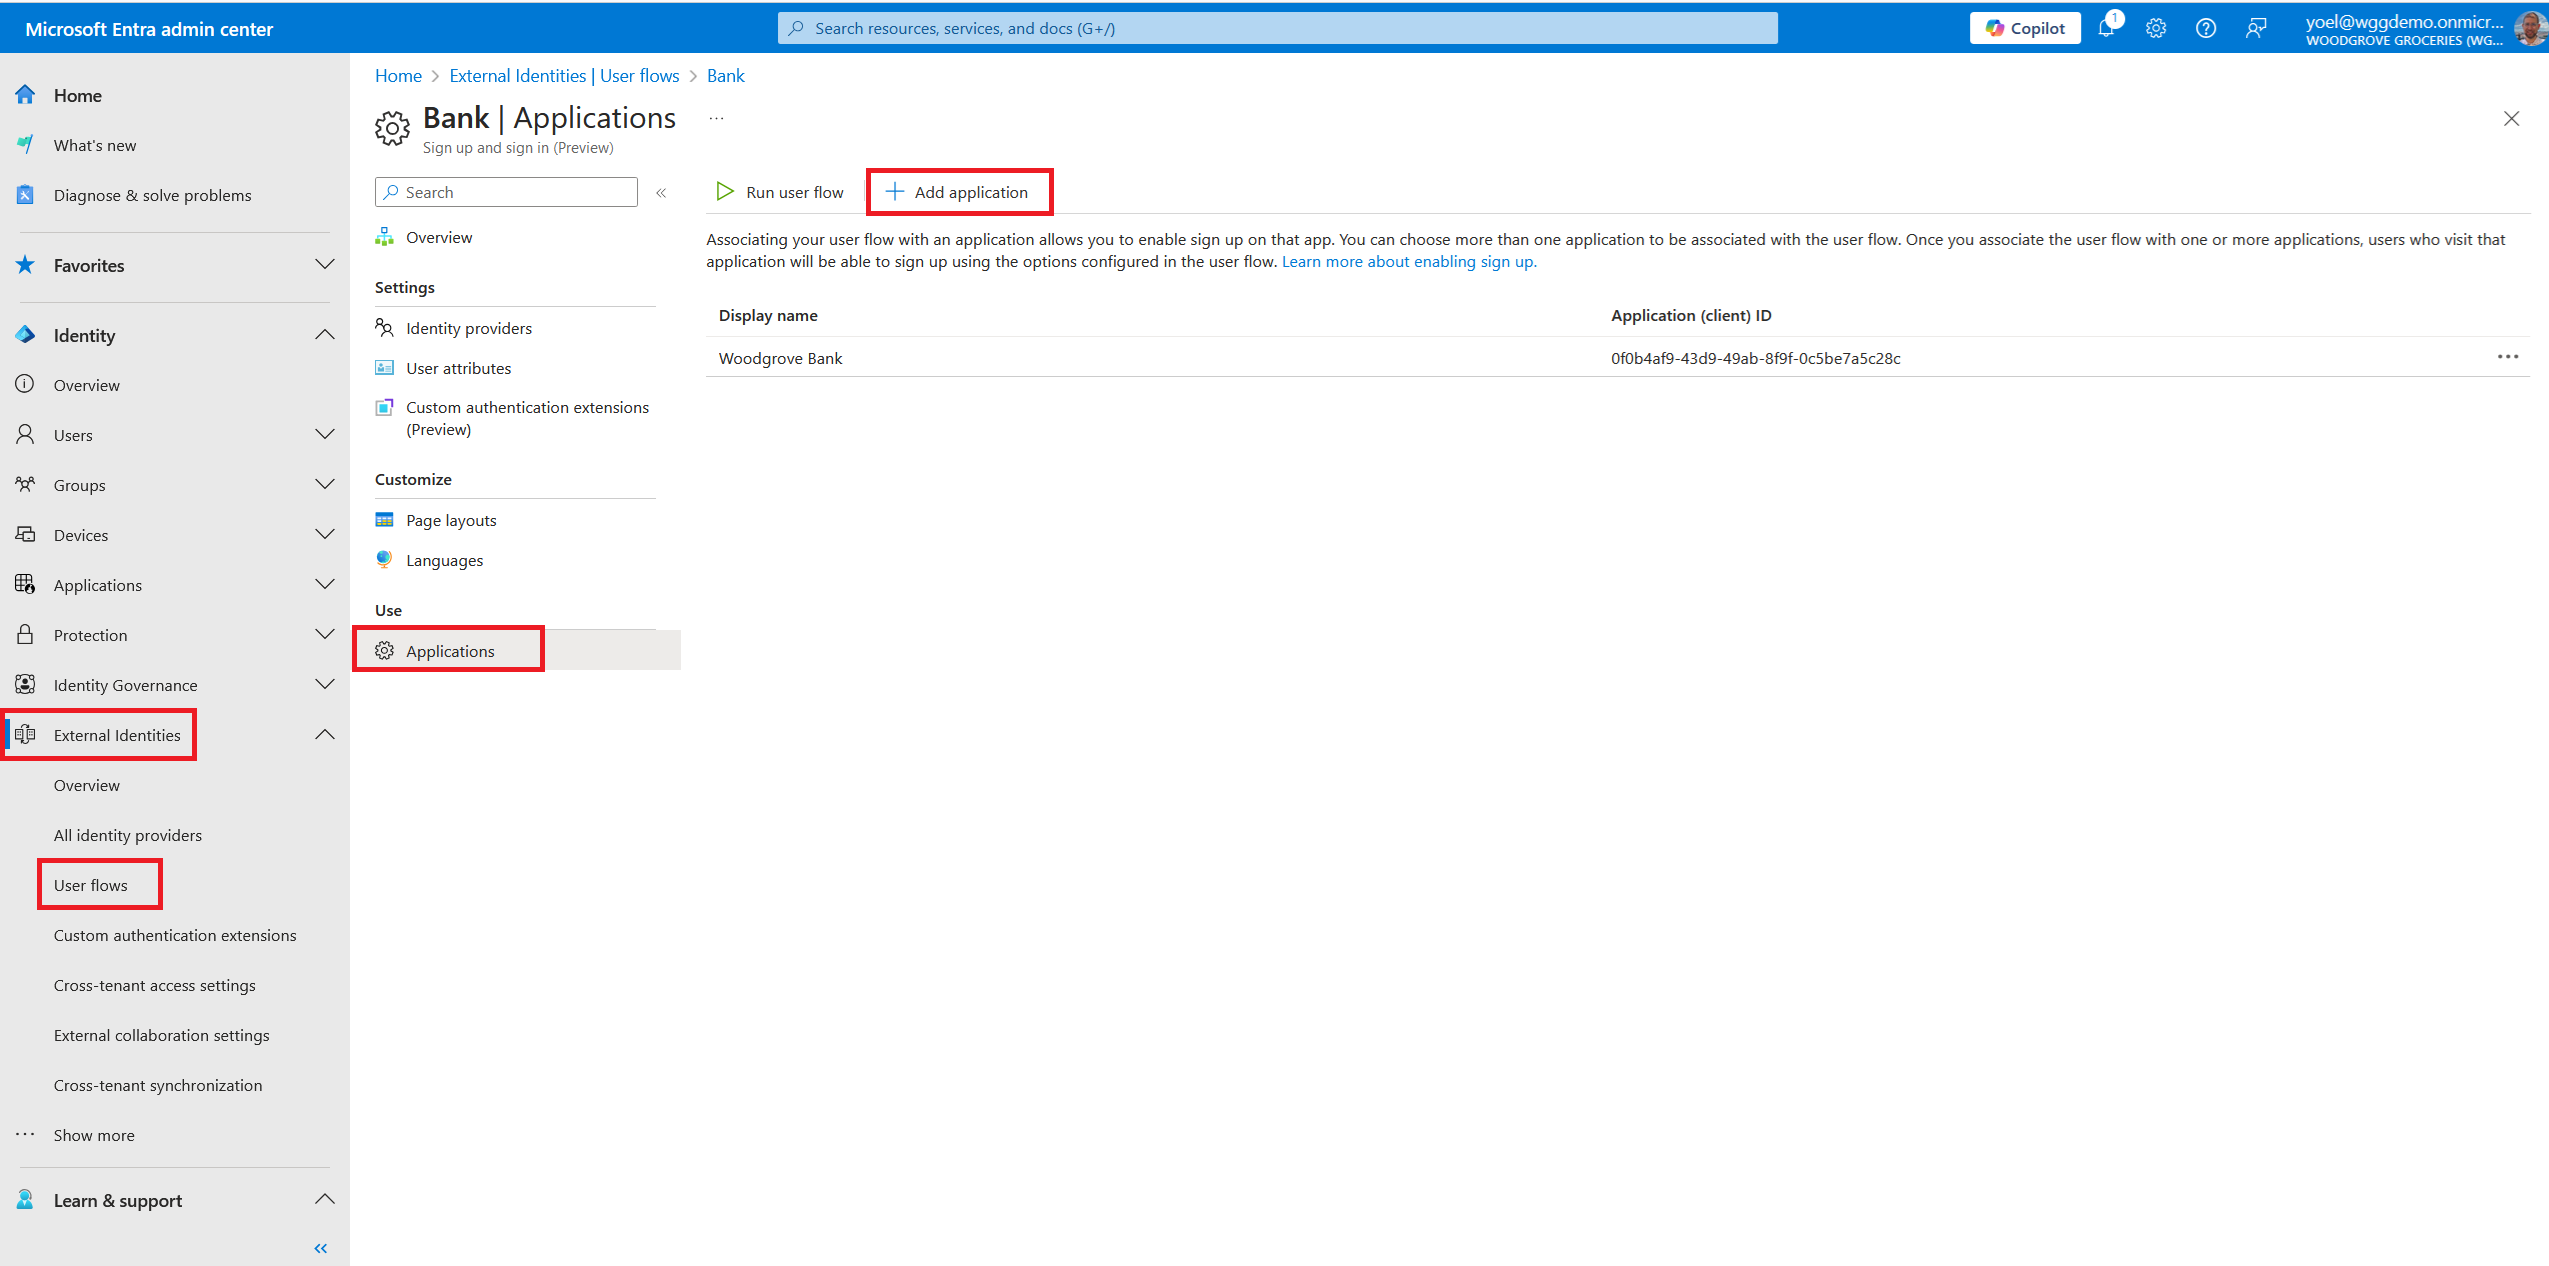
Finally, associate your application with a user flow. To do so, go to External Identities > User flows and from the list of user flows select the user flow to associate with your application. Then, in the user flow, select Applications and add your application to the user flow, by selecting the Add application button and select the application you just created.